When it comes to painting wood, whether it's a piece of furniture, a door, or a craft project, the preparation phase is as crucial as the painting itself. Proper preparation is necessary to make sure that the paint adheres as well as it can, lasts longer, and looks professional.
This guide will walk you through the essential steps to prep wood for painting, so you can get results you’ll be proud of. Whether you're a seasoned woodworker or just starting out, these tips will help you achieve a flawless finish.
Understanding Wood Surfaces
Before diving into the preparation process, you should understand the diverse types of wood surfaces you might come across. Wood, in its various forms, has unique characteristics that have a direct impact on how you should prepare it for painting.
Hardwood and Softwood:
- Hardwoods (e.g., oak, maple) are denser with tighter grain, requiring minimal sanding.
- Softwood (e.g., pine, cedar) are lighter, prone to damage, and need a gentler touch.
New vs. Old Wood:
- New wood has a smoother surface but may contain resins that need sanding.
- Old wood may have paint/varnish layers and damage (cracks, splinters) that need addressing
Treated or Untreated:
- Treated wood is chemically processed for outdoor settings, requiring thorough cleaning and sanding for good paint adherence.
- Untreated wood is more natural but susceptible to environmental damage.
Understanding your wood type and its condition is the first step towards effective preparation. It helps you tailor your approach for the best painting results.
Tools and Materials for Wood Preparation

Having the right tools and materials is essential for effectively prepping your wood surface. Here's what you'll need:
- Sanding Tools: Sanding is a critical step in wood preparation. For this, you can use various sanding tools depending on the size and complexity of your project. Handheld sandpaper, sanding blocks, or electric sanders are great options. Empire Abrasives offers a range of quality sanding products, from sandpaper sheets to sanding belts, suitable for different types of wood surfaces.
- Cleaners and Degreasers: A clean surface is vital before you start sanding. You’ll want to use a wood cleaner or a degreaser to remove any dirt, grease, or residues from the wood. This step is done so you're working with a clean slate.
- Wood Filler: To address any cracks, holes, or imperfections in the wood, a good quality wood filler is indispensable. It helps create a smooth, even surface for painting.
- Putty Knife: A putty knife is useful for applying and smoothing wood filler.
- Tack Cloth: After sanding, a tack cloth is useful to have around for wiping away any remaining dust without leaving residues behind.
- Safety Gear: Don’t forget personal safety equipment like gloves, safety glasses, and a dust mask, especially when sanding or working with chemicals.
Gathering these tools and materials before you begin will streamline your process or prepping wood for paint, making it more efficient and effective.
Step-by-Step Guide to Preparing Wood for Painting
Proper preparation of your wood surface can make the difference between a mediocre finish and a professional-looking one. Here’s how to do it right:
1. Clean the Wood Surface
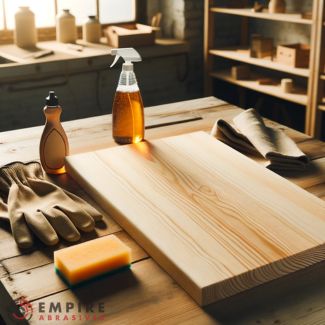 The first step in wood preparation is making sure the surface is completely clean and free from any contaminants. Getting you wood surface free from contaminants is the key to achieving an even paint application and preventing issues like bubbling or chipping
- Start with a Clean Slate: Before any sanding, ensure your wood is free of dust, dirt, and grease. Use a cleaner or degreaser, applying it with a clean rag or sponge. Allow the wood to dry completely after cleaning.
- Inspect the Wood: Look for any signs of damage or wear, such as cracks, splinters, or old paint and varnish. This inspection will guide your next steps in the preparation process.
2. Sand the Wood
 Sanding is the cornerstone of wood preparation, setting the stage for a smooth painting process. Choosing the right sandpaper and technique is essential.
- Choosing the Right Grit: Start with a coarser grit sandpaper (like 100-150 grit) for initial sanding, especially if removing old paint or smoothing rough surfaces. Gradually move to finer grits (220-320 grit) for a smooth finish. Empire Abrasives offers a wide selection of sandpapers suitable for each stage.
- Technique Matters: Sand along the grain of the wood to avoid scratches. For large, flat areas, an electric sander can save time and effort. For detailed or delicate areas, hand sanding might be more appropriate.
- Dust Removal: After sanding, use a tack cloth or a vacuum with a brush attachment to remove all the sanding dust. This step is crucial for a clean surface ready for painting.
3. Address Imperfections
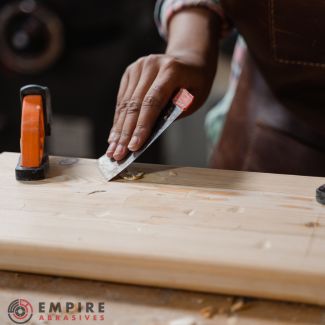 Even the smallest imperfections in wood can compromise your final paint job. Addressing these irregularities is a critical step to achieve a uniformly smooth surface that you can be proud of.
- Fill in the Gaps: Use wood filler for any cracks, holes, or imperfections. Apply the wood filler with a putty knife and smooth it out. Wait for all of the putty to fully dry before the next step. The manufacturer’s instructions should have a good estimate for how long this will take, which can vary for each brand.
- Final Sanding: Once the filler is dry, sand the area lightly with fine-grit sandpaper to ensure an even, smooth surface. Then make sure to wipe the area clean of any dust or residue.
4. Apply Primer
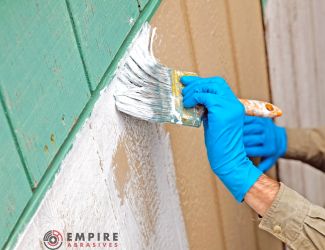 Priming sets the foundation for painting. It's an integral step, especially for woods with specific characteristics that might affect paint adherence and appearance.
- The Foundation Layer: Applying a primer is essential, especially for woods that are prone to bleeding or have uneven tones. It helps in achieving a uniform finish and enhances paint adhesion.
- Choosing the Right Primer: Select a primer suitable for your wood type and the paint you’ll be using. Apply it evenly with a brush or roller, and let it dry as recommended.
Common Mistakes to Avoid
Even with the best intentions, there are some common mistakes that can compromise the quality of your wood painting project. Here are some to watch out for:
1. Skipping Sanding
- Sanding is not just about smoothing the surface; it's about creating a texture for the paint to adhere to. Skipping this step can lead to poor paint adhesion and a less durable finish.
2. Not Cleaning Properly
- Dust, grease, and residues can prevent paint from sticking properly. Always do a thorough cleaning before moving to sanding and painting.
3. Overlooking Safety Precautions
- Always wear safety gear, especially when sanding or using chemical products. This includes gloves, safety glasses, and a dust mask.
4. Rushing the Process
- Good preparation takes time. Rushing through the steps can result in a finish that doesn't last or look as you intended.
5. Using the Wrong Materials
- Not all sandpapers and primers are created equal. Using the wrong type can affect the end result. Rely on quality products like those from Empire Abrasives to ensure the best outcome.
By following these steps and avoiding common pitfalls, you set the stage for a successful painting project. The preparation might seem time consuming, but it’s the key to achieving a finish that looks professional and lasts a long time.
Advanced Tips for a Perfect Finish
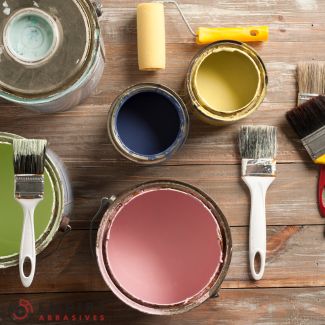
Achieving a professional-caliper finish on your painted wood project isn't just about following the basic steps; it's about knowing the little tricks of the trade that make a big difference. Here are some pro tips:
1. Test the Paint First
Before committing to painting the entire piece, test the paint on a small, inconspicuous area of the wood. This allows you to see how the paint adheres and looks on the wood surface.
2. Consider Grain Filling
For woods with an open grain, like oak, consider using a grain filler. Grain fillers help create a super smooth finish by filling the pores in the wood.
3. Multiple Thin Coats
When it comes to both primer and paint, multiple thin coats are better than one thick coat. Thin coats dry faster and reduce the chances of drips or brush marks.
4. Sand Between Coats
Lightly sanding the wood between coats of primer and paint can make a huge difference. It smooths out any imperfections and provides a better surface for the next coat.
Use a very fine-grit sandpaper, typically in the range of 320 to 400 grit. These finer grits are gentle enough to smooth the surface without removing too much of the primer or paint. Remember to sand lightly and evenly, and always clean off the sanding dust before applying the next coat.
5. Use Quality Brushes or Rollers
The tools you use to apply paint matter. Invest in high-quality brushes or rollers for a smoother, more professional finish.
6. Be Mindful of Temperature and Humidity
Paint doesn’t react well to extreme temperatures or high humidity. Paint in a controlled environment whenever possible.
7. Patience is Key
Allow enough drying time between coats and before using the painted object. Rushing this can lead to smudges or sticking.
Special Considerations in Wood Preparation
Sometimes, you'll need to prep wood surfaces that need special consideration before you start painting. These might include previously painted, lacquered, or damaged wood. Here's how to handle these scenarios:
1. Dealing with Previously Painted Wood
- Clean and (maybe) Strip the Paint: If the existing paint is in good condition, you might not need to strip it off. Simply clean, sand lightly, and apply primer.
- Peeling or Flaking Paint: Remove loose or peeling paint with a scraper, handheld wire brush, or nylon wire abrasives before sanding. If using a wire brush or wire wheel, avoid using them on softwood and avoid using too much pressure that could damage the wood surface.
- Lead Paint Caution: If the wood might have been painted before 1978, it could contain lead. In this case, use a lead test kit and follow safety procedures for lead paint removal.
2. Preparing Lacquered Wood
- Chemical Stripping: Lacquered surfaces are slick and need to be treated for the paint to adhere properly. For thick layers of lacquer or other hard finishes, consider using a chemical stripper. Apply it according to the manufacturer's instructions, let it sit, and then scrape off the softened finish.
- Safety Precautions: Wear gloves, eye protection, and work in a well-ventilated area when using chemical strippers.
- Neutralizing the Stripper: Some strippers require neutralizing with water or another specific solution. Ensure you follow these steps before proceeding.
3. Working with Varnished Wood
- Like lacquer, varnish should be stripped off for the best painting results. After stripping, sand the surface to ensure it's smooth and ready for painting.
4. Addressing Wood with Stains or Water Marks
- Bleaching: For stains or watermarks, wood bleach can be used. Apply it evenly, let it sit, and then rinse it off as per the instructions.
- Sanding After Bleaching: Sand the wood after it's completely dry from the bleaching process.
5. Preparing Intricately Designed Wood
- Detail Sanding Tools: For wood with intricate designs or carvings, be extra careful during sanding. Use smaller tools or sand by hand to get into the crevices without damaging the design. Spiral bands, cross pads, or cartridge rolls are excellent for getting into small crevices and detailed areas without damaging intricate designs.
6. Previously Oiled or Waxed Wood
- Removing Oil or Wax: Clean the surface with a degreaser or a mixture of vinegar and water to remove oil or wax residues.
- Sanding: After cleaning, proceed with sanding. Oiled surfaces may require more thorough sanding to ensure the new paint adheres properly.
7. Rough or Weathered Wood
- Heavier Sanding Required: Start with a more aggressive sanding using coarse-grit sandpaper to even out rough or uneven surfaces.
- Sanding Tools: For very rough surfaces, a power sander, sanding drums, or a sanding block might be more effective than hand sanding.
By considering these special scenarios, you can ensure that your wood painting project is successful, regardless of the condition or type of wood you start with. Each situation requires a slightly different approach, but with the right preparation, you can achieve a beautiful finish every time.
FAQ Section
Q: Can I paint over varnished wood without sanding?
- A: It's not recommended. Sanding varnished wood will lead to much better paint adhesion. If you prefer not to sand, use a high-quality primer designed for varnished surfaces.
Q: How do I know when I've sanded enough?
- A: The wood should feel smooth to the touch and have an even appearance. If you're painting, the surface doesn't need to be as smooth as it would for staining.
Q: What type of sandpaper should I use for wood preparation?
- A: Start with a coarser grit (100-150) for initial sanding and move to finer grit (220-320) for final smoothing. Empire Abrasives offers a range of sandpapers suitable for different stages of wood preparation.
Q: What happens if I paint directly on wood without a primer? Is it necessary to use a primer on wood?
- Painting directly on wood without a primer can lead to several issues:
- Poor adhesion: The paint may not adhere properly to the wood's surface, leading to peeling, chipping, or flaking over time.
- Uneven absorption: Wood is a porous material, and it can absorb paint unevenly. This can result in a blotchy or streaky finish.
- Moisture damage: Wood is susceptible to moisture damage, and painting without a primer can exacerbate this issue. The paint can trap moisture inside the wood, leading to warping, rotting, or mold growth.
- Reduced durability: Paint applied directly to wood is more likely to wear and fade prematurely. This is because the paint is not protected from the elements or from the natural movement of the wood.
Using a primer on wood helps to address these issues by:
- Creating a barrier: A primer creates a barrier between the wood and the paint, which helps to improve adhesion and prevent moisture damage.
- Promoting even absorption: A primer helps to seal the wood's pores and promote even absorption of the paint, resulting in a smooth, uniform finish.
- Extending the life of the paint: A primer helps to protect the paint from wear and fading, extending its lifespan.
Overall, using a primer on wood before painting is highly recommended to ensure a durable, long-lasting finish.
Q: How long should I wait between coats of paint?
- A: It depends on the paint type and environmental conditions. Generally, waiting a few hours or as recommended by the paint manufacturer is advisable.
Conclusion
Preparing wood for painting is a crucial step in any woodworking project. It's about more than just making your piece look good; it's about ensuring durability and a professional finish. By following the steps outlined in this guide, you can transform any piece of wood into a smooth, paint-ready surface. Remember, patience and attention to detail are key. Don't rush the preparation process and invest in quality tools and materials like those offered by Empire Abrasives to ensure the best results.
Whether you're tackling a small DIY project or a large-scale woodworking task, the satisfaction of a job well done is unmatched. So, take your time, follow these steps, and watch as your woodwork turns into a masterpiece.
Additional Resources
For more tips and tricks on woodworking and preparation techniques, don't forget to explore other related articles on Empire Abrasives’ blog:
